Overview:
There are many question types to choose from. To understand what all the different question types offer, please see please see article on default questions or article on custom questions.
Step-by-step instructions:
- To add a question, click on the “+” in the top left and select the question type that you want to add:
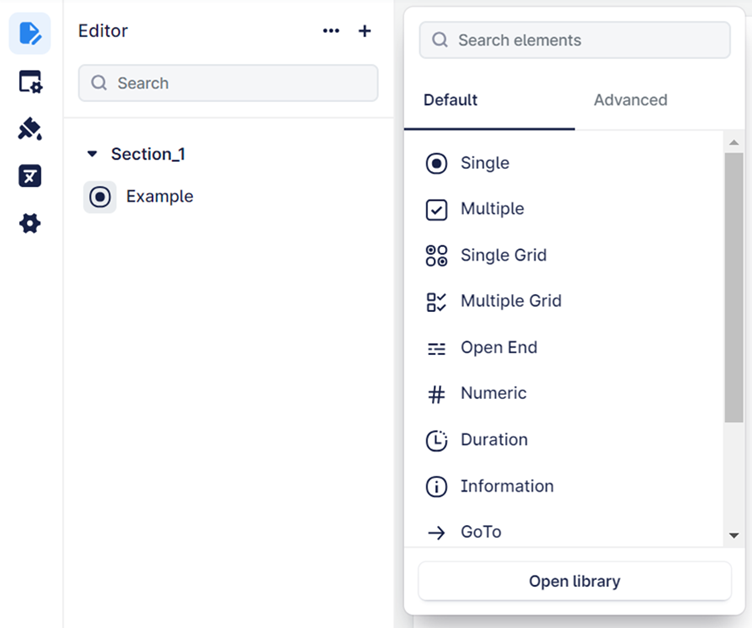
2. The selected question type will appear on the left under “Section 1”:
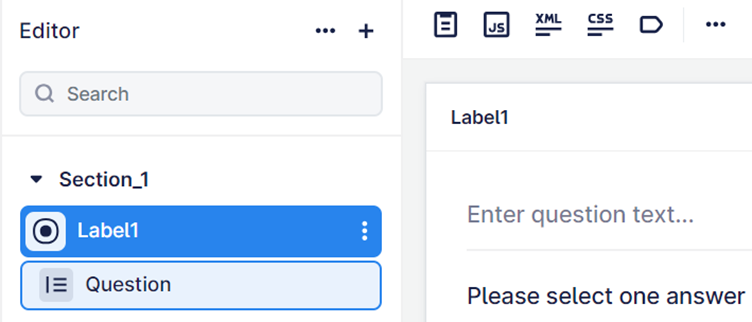
3. When you’ve chosen the appropriate question type (a single punch variable was selected for this example), it will open up the screen where you can change the variable name, question text, answer choices and set options for the question (saving happens automatically in SB):
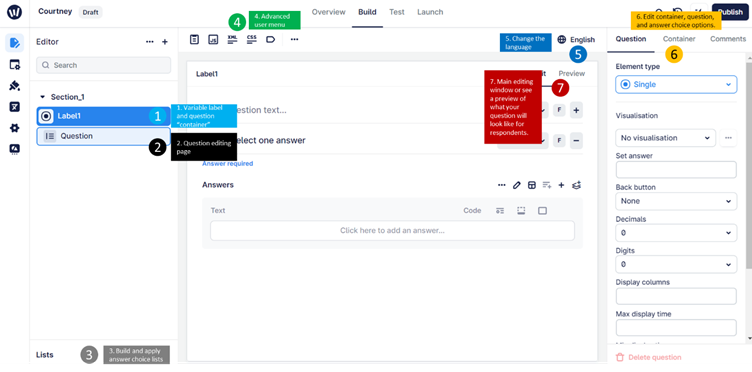
1. Variable Label: You can rename the variable label at top-middle of the page where it currently says “Label1”. You can use an underscore, but no spaces when naming a variable. E.g. “Q1Gen” or “Q1_Gender” are acceptable, but not “Q1. Gender”.
2. Question: the middle part if the Build screen is where you can add, edit and update your questions:
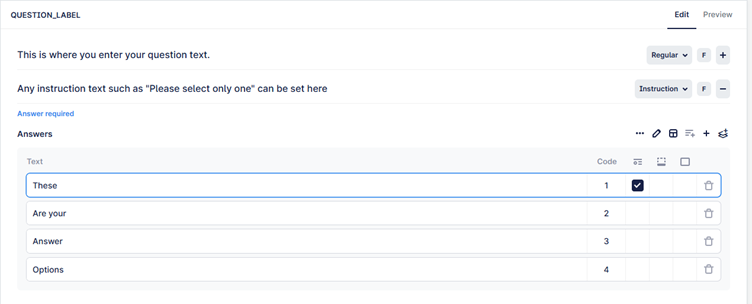
You can enter your question text and decide if it needs an instruction e.g. “Please select one answer”, you can also remove or add more question text boxes by clicking the “-“ or “+” symbols.
Each of the types below can be adjusted in your theme to show the text in a certain way. E.g. Regular would be considered your main question text so would be more prominent
Instruction could be set to be smaller size and perhaps in italics
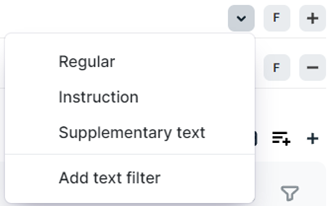
If your question has a filter, you can access this by clicking “F” (once this has been set-up, see step 3a. in this article or the full article about <<Filters>>).
3. Answer choices: Additionally, in the middle space you can add your answer choices. You can do this in two ways by using the “+” to add another row or by clicking on the pencil  icon to add all options at once.
3a. Hover over each icon to reveal its function:
... Set the direction of the codes (ascending or descending)
 Edit all answers at once (see screen shot)
 Advanced user view
 Add a predefined List (see 3 in this article or see the full article about <<List article>>.
 Add a new answer choice row
 Add a header to your answer choices
 The numeric value assigned to the answer row
 Allows the user mark exclusive codes in multi-response questions
 Keep position allows the user to pin down an answer choice so it doesn't rotate
 Allows the user to add a text box, for an “other specify” type answer
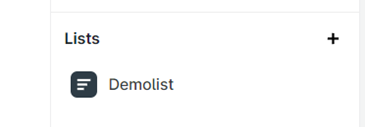
4. Lists: by clicking on the “+” next to “Lists” you can add your own list to insert into your answer choice options. Please see <<Lists>> for more details.
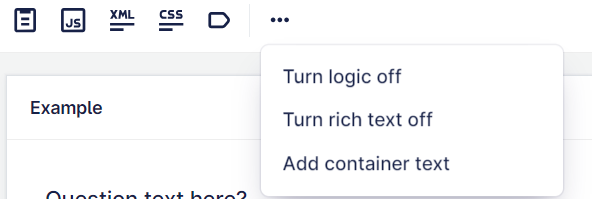
5. The scripting and ellipsis “…” menu at the top of the middle section allows you to delete a question, view the XML scripting, insert JavaScript, turn the logic on your question on/off, edit the question tags for your, and add text for your container.
6. Languages: if your survey has multiple languages, you can switch between them via this menu. This allows you to preview the question in that language, but also make edits to that language version directly, without having to export the translation file.

7. Edit your container, question, and answer code settings. Make sure to update these when you’re finished.
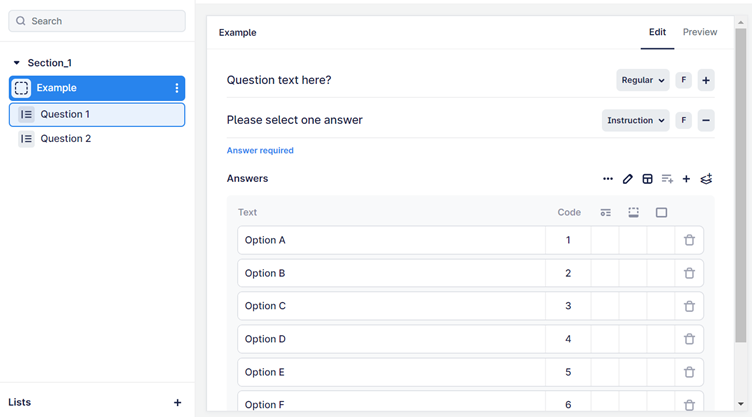
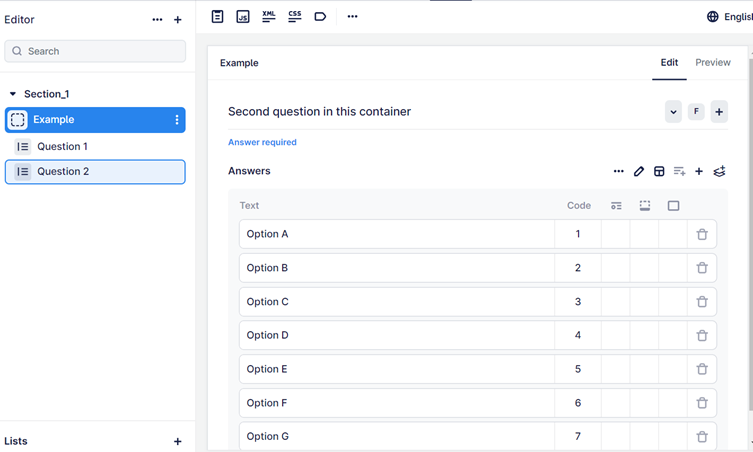
7a. Container: Each question will have its own space where it is housed called a “container”. For individual questions like gender or age, there may only be one question in the container. However, for questions where the user wants the answer choice list to be the same for a series of questions, the container does this automatically.
For example, this will be useful for common questions in shopper or path-to-purchase studies. It will also help users to create funnel series. The example below shows what the display looks like and how a user might use this for a multi-response question asking about likability and a follow-on single response question about a favourite. Note that while questions in a container share the same answer list, they can be different types.
Question 1 in the “P2P_Set” Container:
Question 2 in the “P2P_Set” Container:
7b. Question edit options: change the question type and decide what settings need to be applied to your question.
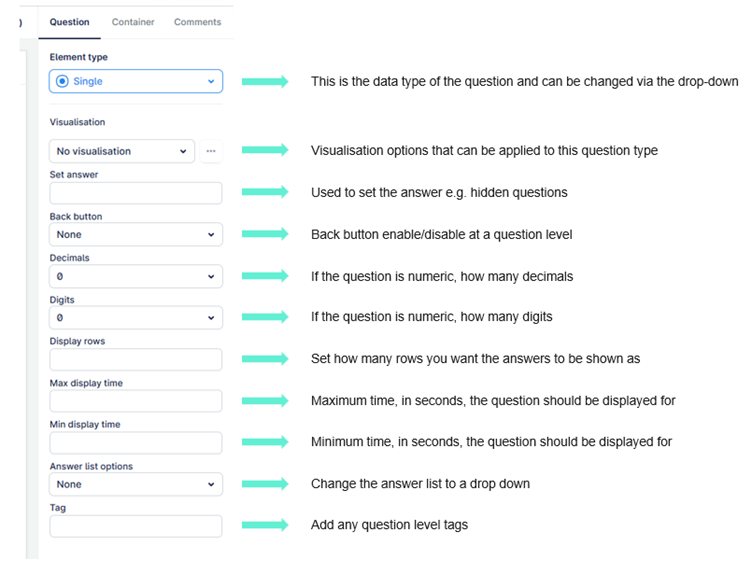
*Delete question will only be clickable if there is more than one question in the Container. To delete a question when there is only one question in the Container, you need to delete the entire container from the "Container" tab.
7c. Answer choice options: Click on an answer choice row. Then you can set specific filters for an answer choice or copy settings from another answer choice (so you only have to set-up the options once). You can also change the code, decide if it’s mutually exclusive and tag the answer choice for use in other studies. You can also disable a row here.
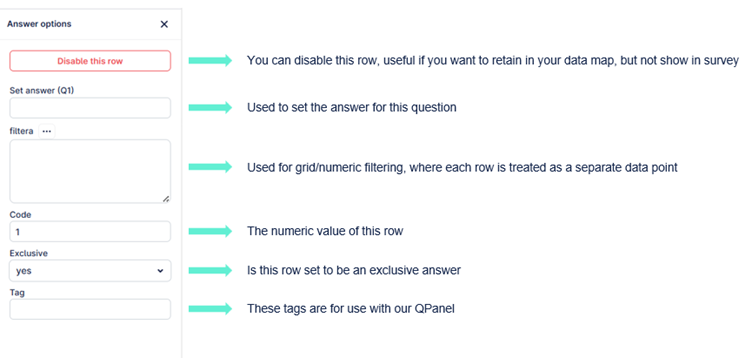
Note: If you have more than one question in your container, you will see additional boxes like "Set answer (Q2)" and "filterb".
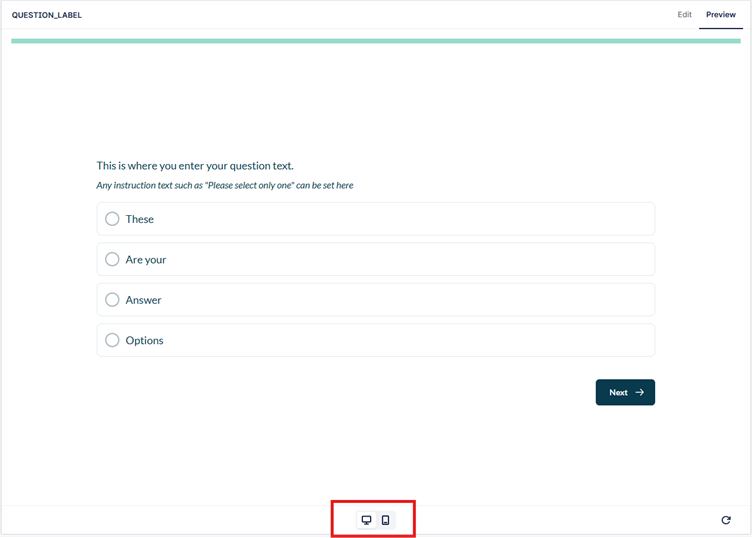
8. This is the main edit window or see a preview (below) of how the question you created will look on a desktop (or mobile); you can toggle the view with the highlighted option below.